Showing posts with label Sarah Routledge. Show all posts

Wednesday, July 23, 2014

Sarah's beautiful creations

Hi everyone!
I hope your Wednesday is going well!

Today I am sharing a couple of fabulous creations from Sarah!

This first one if a gorgeous mixed media canvas.


She started off by adding some bits of drywall tape to the canvas and then priming it with the Art Anthology Gesso included in the Creativity Add-on. She then misted the canvas with three Mists from my stash,  added torn bits of the "Chrononaut" paper from the Bo Bunny Somewhere in Time collection which she distressed and inked with Distress Ink.  Added the torn papers to the canvas with  Mod Podge.  Then did some masking with  a mix of two of the Art Anthology paints from the Colour Add-on - the Stone Effects Dimensional Medium in Sandstone mixed with the Velvet Dimensional Paint in Kona. Here is a different angle of the full canvas.


She fussy-cut the corset from the "Elegance" Bo Bunny paper and inked it with the Distress Ink. She  added some dimension to the bodice by flipping it over and rubbing 'appropriate' areas with a ball tool. She created the skirt using a section of a sewing pattern and some black lace from a previous SOD Kit (Oct. '13) and splattered it with the black and copper mists. She added the chain from the Creativity Add-on to the watch fob from the Embellishment Add-on and used it as a belt for the dress. To embellish the canvas, She added the small black wings (Embellishment Add-on) and Prima flowers (Main Kit & Flower Add-on).  Here are some close-ups of the dress and embellishments on the canvas.


Next is a fabulous layout............


She used the Kaisercraft Heirloom collection papers and collectables, burlap ribbon and Prima flowers from the kit/add-ons, along with the gesso and two colours of gelatos (Iced Coffee and Iced Chai) from the Creativity Add-on. 
Here is some close-ups!


and finally a really creative and fabulous ATC!


This ATC was created for the June ATC swap created with the Marion Smith Designs Nirvana papers

She fussy cut the paper pieces from the Nirvana papers. The embellishments include some handmade flowers,  a metal flower, a wooden film strip piece, Tim Holtz film strip ribbon and a Tim Holtz rub-on from a previous SOD Kit.

Thanks for stopping by

Sunday, June 22, 2014

Sarah's beautiful work with our Twisted & Tangled kit

Hello, I hope you all had a beautiful weekend!  Here in Alaska it was definitely sunny and beautiful (this time of year, it's always sunny, there's no darkness, even at night - thank goodness for room darkening curtains, lol!).

So I'm not actually here to talk about the weather, of course!  I wanted to share two gorgeous projects Sarah Routledge has done with our May Twisted & Tangled kit.

The first is a stunning layout, I just love her design on this!


Here's a little close-up and a few details from Sarah:

I started with some gesso on the base page and then layered strips of the Cold Country papers with some strips cut from the cheesecloth in the kit. I added a light coat of gesso to the layers and then used the Shimmer paints to paint along the edges of the strips. I did some masking with light molding paste and some stamping with the butterfly stamp and sentiment included in the Embellishment Add-on. I wanted to add some more texture to the layout, so I added some lines of heavy gel medium and sprinkled clear microbeads on them - LOVE how this added texture and shine to the layout. Finally, I added in some flowers from the Main Kit and Flower Add-on and one of the Prima Ingvild Bolme Junkyard Findings Jeans plates as embellishments.

 She has also done a beautiful mixed media tag.  Here's a photo, and details on it:

I started out by gluing the 7 dots studio paper to a plain tag base. I added cheesecloth, flowers, pearls, chipboard and butterflies to the tag and then misted everything with Dylusions Ink Spray in Posioned Jade. I added some white gesso tot he chipboard, butterflies and pearls and blended it on the tag. Then I misted again with the Jade Dylusions. Once that was dry, I added the sentiment and some of the Shimmerz Paint in Green Olive to the Chipboard and on top of the sentiment to help it blend. I did some masking on the right side of the tag with a Prima mask and some Heavy Gel Medium - to which I added clear microbeads. I then added some Prima Pebbles and clear half beads from a previous SOD kit. Finally I misted the left side of the tag and splattered the whole tag with Dylusions Ink Sprays in Slate Grey and Black Marble.

Thank you for stopping by today, and I hope you have a great night, and a fantastic day tommorow!

~Melinda

Friday, May 30, 2014

A bit from Sarah!

Good afternoon everyone!
I hope you are all having a wonderful day!
Today I am going to share a project from Sarah using the Twisted and Tangled 
Scraps Of Darkness kit!


I just love the funny photo!
For this layout Sarah used the fabulous sketch by SuePup


You do not have to use one of our kits to win!  Just create you project using this sketch and upload it to the community!

Here are a few close ups of Sarah's project!


thanks for stopping by!

Tuesday, May 13, 2014

Sarah's beautiful His & Hers kit project

Morning everyone!
It looks like mother nature is mixed up...Today it is going to feel like 90 degrees and tomorrow in the 50's!  Just doesn't seem right!  I am looking forward to the warm weather!

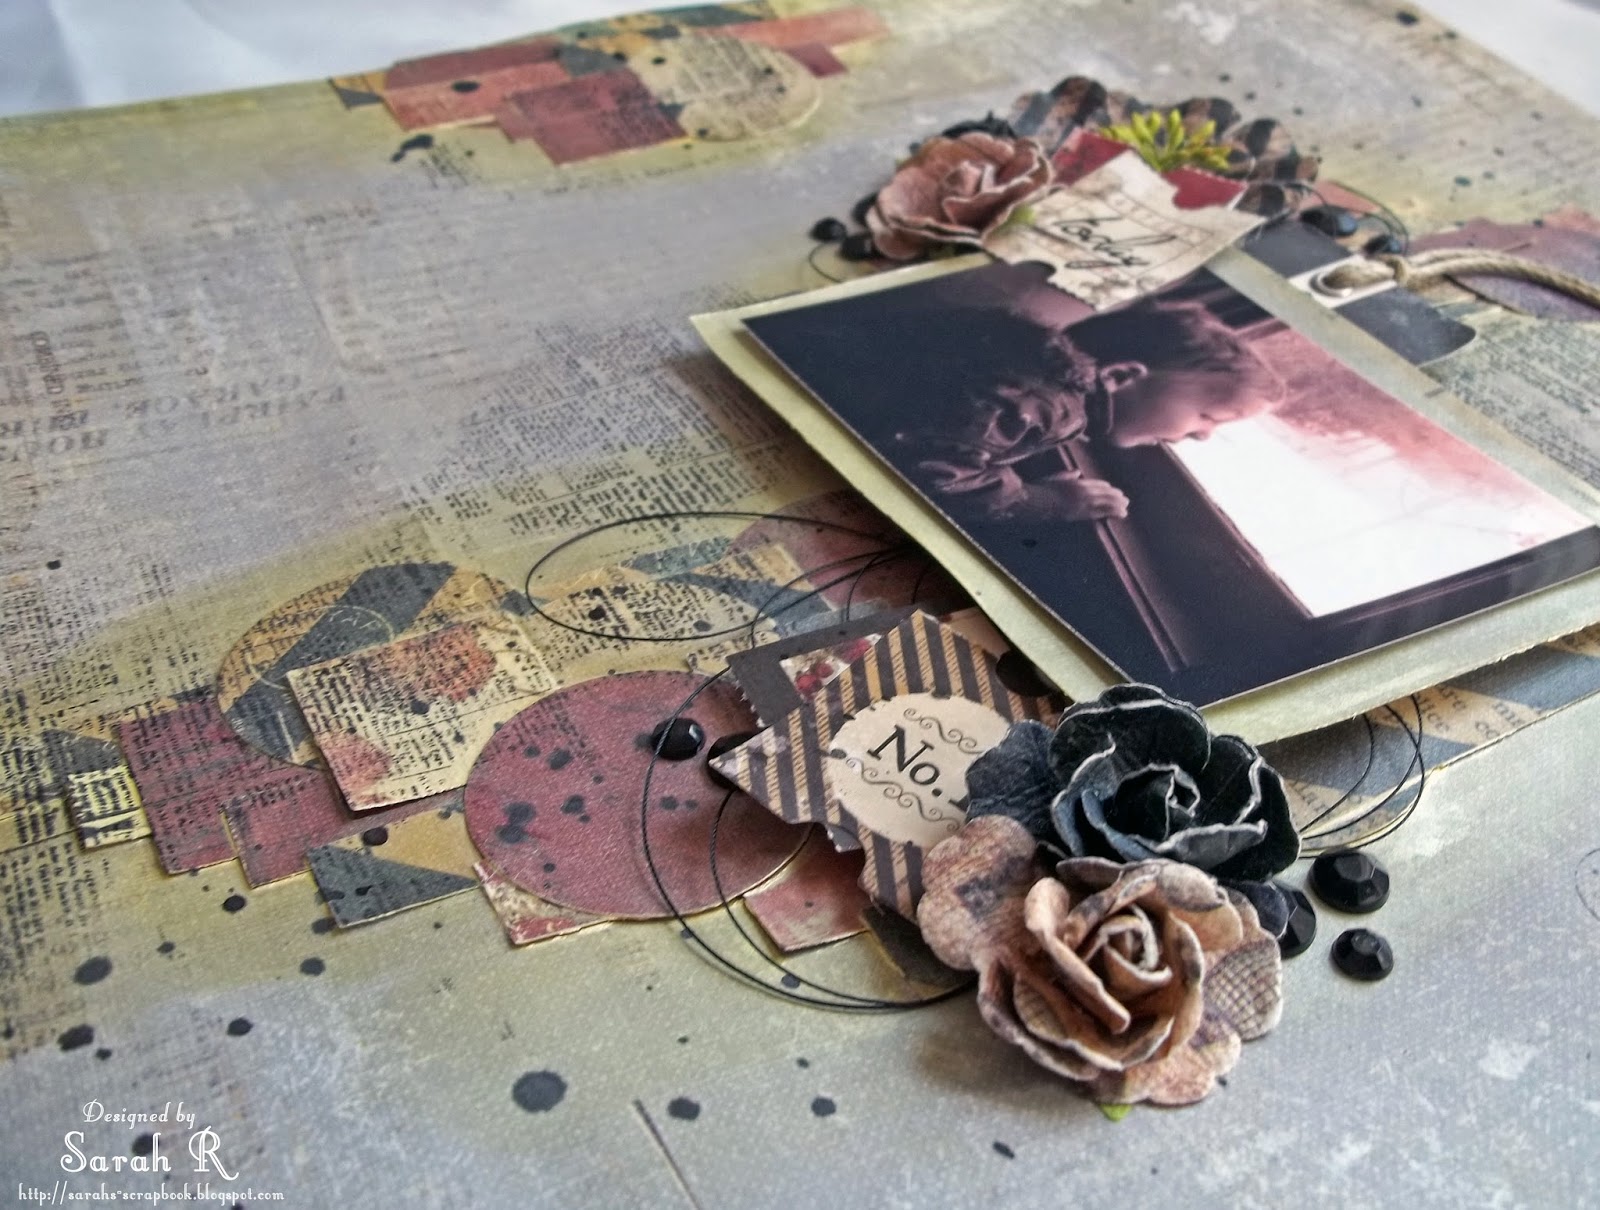
Today I want to share with you a beautiful layout crated by Sarah using the His & Hers kit!


I find this layout very dramatic!  The way she has layered the paper shapes and the inka gold!

She started out layering strips, squares and circles to create the background and the small clusters on either side of the page. Then rubbed all the layered areas with Inka Gold Champagne rub included in the Creativity Add-On. She stamped with a Prima Clear Stamp from her stash and embellished with some Stationer's Desk Flowers, Tags & Tickets, Cartographer flowers and some black rhinestones and heavy black upholstery thread from her stash. As a final touch, she did some splattering with Dylusions Ink in Black Marble.  Here are some close-ups!


Thanks for stopping by!

Friday, April 4, 2014

Morning everyone!  
I hope your Friday is going well!

Today I am sharing a couple of fabulous projects from DT member Sarah


She used the Prima stamps included in the March Kit/Add-ons - I used the chevron stamp (Main Kit) and chevron flower stamp (Embellishment Add-On) as the pops of black on this layout.  She used some chipboard behind the photo and had painted it an olive green - but then I added some of the Lemon Drop Shimmerz Dazzelerz on top. Here are some close-ups!


Her second project I am sharing is of the journal from the creativity add on...

She turned this


into this


First, she took the cover pieces off the binding and then used a sheet of the Amy Tangerine Plus One paper and glued it to the cover pieces using Claudine Hellmuth Studio multi-medium. Then, used a prima floral stencil with three of the colours of Shimmerz Dazzlerz included in the March Colour Add-on (Dreamscicle, Grapetastic and Lemon Drop.)  I love these bright, dimensional flowers - so fun! She coloured the frame using several different colours of watercolour pencils and then rubbed it with a baby wipe to blend the colours. She used some of the Prima Bloom Collection chipboard elements from the kit to complete the cover.  The final addition to the cover was two coats of glossy mod-podge brushed over everything to protect it.

It is so awesome!

thanks for stopping by!


Saturday, March 22, 2014

Sarah's tremendous touch of Grey projects!

This first layout is really awesome


Sarah created this using a Kaisercraft sketch but I just LOVE her interpretation!

I {heart} the tea rings!
She used pieces from the "Art of Life" Collectibles (Embellishments Add-On) and from the Loved paper to create the distressed layering under the photos, as well as some chipboard from her stash - which she painted with black gesso and then embossed with a light dusting of Lindy's Stamp Gang Embossing Powder in Golden Angel Wings (Colour Add-On). After she had completed the layering, but before adding the photos, she splattered the layout with Lindy's Stamp Gang Starburst in Opal Sea Oats (CAO). I used photoshop to create the "polaroid" photos - using a polaroid frame template  found online and photos of her son, which she converted to black and white.


To embellish the layout, she wanted to make it look like someone had emptied their pockets onto the "desk", so she added a wooden domino that she distressed with sandpaper, tiny coins taken off an old necklace, a 7 Gypsies vintage safety pin, a metal key and keyhole and some wooden buttons (EAO), which had soaked in tea to alter the colour. She added a Prima Flair button and two Prima mini-clothespins, rubbed with Tim Holtz Vintage Photo Distress Ink, to the photos.


I wanted to show you how diverse Sarah is

her next layout is so girly and funky...


She wanted to prove that pink is not just a girly colour!

For the colour on the layout, she used Lindy's Stamp Gang Starbursts in Bodacious Blush and Cheshire Cat Cherry, along with Colorbox Chalk Inks in Chianti, Peony and Orchid. There are also some splatters of Black Ink. The papers are a combination of Authentique, Fabscraps and Kaisercraft from the SOD February Kit andShe has added in some Petaloo Flowers (Flower Add-On). The large clear gems and decorative wood pieces are from Teresa Collins' Save The Date collection (Embellishment Add-On) and  some clear bubbles and a Prima Flair button from previous SOD kits. Finally, she added some fuschia and white sequins from her stash. Here are some close-ups!


Thanks for stopping by!

Tuesday, February 18, 2014

Sarah's style & Sophistication creations

I love Sarah's style!

she isn't afraid to try new things and have fun!


She used the Creativity Add-on and layered the two 6x6 canvases to make this "Couture" creation!


She primed the canvases then sprayed them and the flowers with  Lindy's Stamp Gang Jack in the Pulpit Teal mist (Colour Add-on)


She made these embellishments using the SOD December 2013 Creativity Add-on. The Martha Stewart Mold coordinated so well with the design on the frame that it was perfect for this project! She used the Paperclay with the mold and, once they dried, painted them with the Lumiere Halo Blue Gold Acrylic (January Creativity Add-on) and then rubbed them with the Silks Acrylic Glaze in Black Ice to Antique them.


Keeping with the altered theme her next project is an altered necklace holder


Beautiful right?

~Laura

Saturday, January 11, 2014

Sarah's gorgeous winter layouts

Hi everyone!

Today I am going to inspire you with Sarah's creations


she did some masking with a Crafter's Workshop mask and Light Molding paste, then cut squares/rectangles from the Journal sheet of the Bo Bunny paper and also added squares of burlap from her stash to the layering under the photo, and brushed the Prima flowers with white gesso to coordinate them with the chipboards.


Here is another of her beautiful creations....

this one is based on this months sketch


I love all the 'snow'


Thanks for stopping by!

Monday, December 2, 2013

"Love This" mixed media layout by Sarah!

I really love creating these sketch posts on the blog!
Each designers interpretation is different and I love how the same sketch varies
from designer to designer!

Today I am showcasing Sarah's


I love how she used the stencil with some fiber paste and the inka gold in blue
The circles are the 3D stamp paint from the Creativity Add-on....she painted the edge of the paint lid and stamped that on the page.


She used drywall tape and staples!  how creative!


She always twisted the petaloo vine around the leaky shed chipboard piece!
love the clustering!


Thanks for stopping by