Sunday, January 31, 2016

Oh-So-Sweet DIY Butterfly Embellishments Tutorial

Love using butterflies on your projects?  Then we've got the perfect tutorial for you today!

Oh-So-Sweet Butterflies in pink and blue

Tracey Sabella made these super sweet and sparkly butterflies with our January Adore Kit Creativity Add On.  The add on included these adorable Theo Butterfly dies by Poppystamps. She also used mediums that were in the Color and Elements Add Ons to embellish them.

Before I share the video, I just thought I'd show you how she used these beauties. She created both of these cards with the main kit and add ons:


Aren't they just gorgeous?!

And on to the tutorial, so you can see how she created the butterflies:


The Creativity Add On also included Poppystamps' Cheviot Butterfly Die, which is a solid die without the lacy cutouts.  Between the two, your butterfly creating possibilities are endless, not only can you use them with cardstock as Tracey did, you can also match your project perfectly by using them with patterned papers, vellum, or even acetate.  

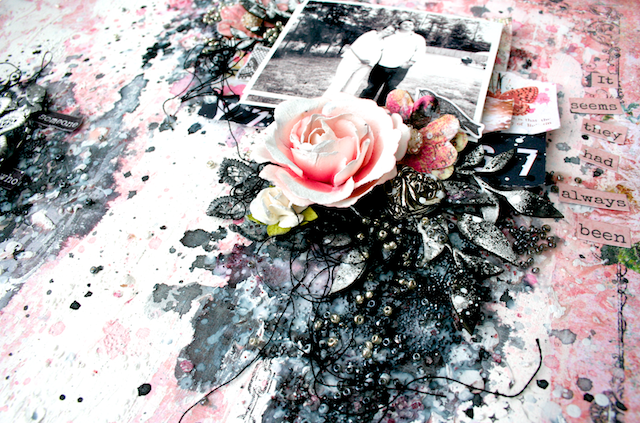
Here are a few close up photos of the cards Tracey made with the kit and her beautiful butterflies:


I hope you enjoyed today's tutorial, and I hope we've inspired you to get out those craft supplies and make yourself some gorgeous embellishments!

~Melinda

Saturday, January 30, 2016

Learn how to create a stunning mixed media layout: Tutorial

Yesterday we shared a tutorial for a gorgeous mixed media off-the-page project, and today we've got one for 'on-the-page'!

Beloved Kit mixed media layout by Tanya

Tanya used our January Beloved kit to create this striking layout, and the background papers she used (Graphic 45 Mon Amour True Love and Kaisercraft Ma Cherie Elegant - both were in the main kit) beautifully compliment the photo she chose.

Here's the video for this stunning mixed media layout:


And a few close-up/detail photos:


Thank you for stopping by today, and if you visit us again tomorrow, you will find yet another tutorial (for the sweetest of sweet embellishments!).

~Melinda

Friday, January 29, 2016

Mixed media Valentine's Day Heart Box Tutorial

Good morning, and happy Friday!

If you've been procrastinating on creating the perfect Valentine's Day gift for your sweetheart, you're in luck, because Tanya's done a great video tutorial for this gorgeous project:

Valentine's Day mixed media altered heart box created with our Beloved Kit.

Our January Scraps of Darkness Creativity Add On included this fantastic 12" Heart Box by Darice:

And Tanya turned it into that stunning lavender beauty you see above.  She also used the gold Wink of Stella marker that was also in the Creativity Add On, and the BoBunny Double Dot Jewels, Blue Fern Studios chipboard Large Royal Border, Crafter's Workshop Gabrielle Pollacco It's Complicated Stencil, and Woodsies Hearts from the main kit (Beloved), to create it.

Here's the tutorial, showing how she transformed that plain heart shaped box into a stunning keepsake or gift box:


And a few close-up shots:


I hope you enjoyed today's tutorial (we'll have another one tomorrow!), and I hope we've inspired you to create something amazing for the one you love for February 14th.

Thanks for stopping by today, and I'll see you tomorrow!

~Melinda


Thursday, January 28, 2016

'I Do' with the Adore kit!

Good morning everyone!
The beautiful 'Adore' kit is perfect for commemorating 
one of the most important days in anyone lives...their wedding!
Nicole created two amazing wedding pages with the Adore kit...


You can see that I used the TCW stencil with distress ink to add 
some shabby brick design on the background.


Nicole's next fabulous layout is a double page!!!


She also used several add-on kits: Elements, Color and Floral


The wooden hearts were painted with silver paint, then covered in glitter paintwith a faint touch of Finnabair microbeads from the Color Add-On.
 
 
Thanks so much for stopping by

~Laura!

Wednesday, January 27, 2016

For their Book of Me.....

Good morning!
As scrapbookers we are usually the ones taking the photos....we are not normally in front of the camera, so creating a page about ourselves is not an easy task...
Luckily Annie, Lisa Griffith and Anna have created beautiful pages about themselves!

This gorgeous layout is from Annie using the Scraps Of Elegance kit 'Adore'


Annie started by applying a coat of clear Gesso on the surface, then adhered small peaces of paper, then used the stencil included in the kit with Modeling Paste. Before adding the embellishments and flowers, she added some splashes of Fushia and Turquoise and stamped here and there to add texture.


Anna has created a stunning layout also using the Adore kit 


Anna created this layout using the Blue Fern Studios "First Blush" collection, The Crafter's Workshop: Gabrielle Pollacco 6x6 Tuscan Sun Stencil, Prima: Royal Menagerie Chipboard/Metal/Sequins, Prima flowers Elizabeth from Royal Menagerie collection, Buttons Galore: Fancy Hearts from the main kit.
From the Elements Add On Kit I used BoBunny Foil Transfers Rub-Ons: Silver Accents, Prima Finnabair Art Ingredients: Blush Microbeads, Kaisercraft Ma Cherie Collection: 12x12 Cardstock Stickers and Blue Fern Studios Laser Cut Chipboard - Romantic Page Dangles.


And finally we have this tremendous layout by Lisa Griffith
also using the Adore kit


This photo dates back to when she was pregnant. She sat down with these papers and flowers and just wanted to do something very dramatic with a lot of textures and colors. She started with some gel medium through a couple of different stencils and then added inks, stamping and lots of beads.


Thanks for stopping by
~Laura

Tuesday, January 26, 2016

Lisa's gorgeous Valentine's Day mini album.....

Good Morning everyone!
Lisa Novogrodski created this amazing mini using the 
Scraps Of Darkness kit 'Beloved'


She used "True Love" as the background layer for the front and back covers. The kit has sold out, but you can find the papers she used ------- HERE
She also used the Mon Amour Chipboard and BoBunny Foil Transfer Rub Ons from the Elements Add On, and we still have those in stock, which you can find -------  HERE
The florals were in the Creativity ------- HERE ( Prima Something Blue- Best Man) and Prima Esperanza found ---- HERE and in the Floral Add On


She got this idea on how to close up this mini album from her friend Lisa Gregory. She used 2 clips and tied the bow to them. Now there is no need to untie the bow just unclip to view the inside of the album. Genius! 


A little close up of the cover using the foil rub ons in the background. They go on like a dream and were in the Elements Add On
She used a mini album from her stash and covered it all in the papers. She likes to use something special on the edges so she chose Lumiere Paints (from previous kits) in a gold and blue tone to paint all her edges and make splatter on each page.


She added the rub ons to the background on some of the pages and used the  Graphic 45 Cardstock stickers --- we have some of those in the STORE ------- HERE.  Although you may miss out on kits you don't have to miss out on some of the products or similar ones as we have a full on line store to meet your needs!

 She created several pages with pockets. The "Forever Mine" and "One and Only" sheets are perfect for photo mats or tags to tuck in your minis. She rounded off the corners with a punch and backed with a gray cardstock. She used the cardstock from the add on and you can find it in the store ------ HERE.

She topped off each of the tags with a little gem from the BoBunny Double Dot Tuxedo Jewels. Those were in the Main Kit this month, but we also have them in the store here


She likes to die cut the journal cards and graphics on the pattern paper sheets to make them extra special.


She fussy cut the image of the lady from the Mon Amour patterned paper and added those rosettes from her stash.


This is a peek at the back of the album, which is covered in the same paper as the front with BoBunny rub ons for the dots.


Finally a side view of the various ribbons she added to the rings. This mini is pretty thick and holds plenty of room for cherished photos and journaled memories.

Thanks for stopping by!
~Laura